How to make Chatbot with Google Dialogflow: Key Insights
Artificial intelligence has evolved rapidly over the course of past few years and chatbots have been one of its most noticeable implementations. Nowadays, web-based businesses whether B2B, B2C or B2E are relying on chatbots for customer engagement and handling rudimentary queries – thus reducing human intervention.
The global chatbot market is set to grow at CAGR of 37.11 during the period of 2017–2021 — Orbis Research
With the chatbot market expanding at a swift pace, Google also made its presence felt by acquiring API.AI last year. By adding a couple of new features to it like support for multiple languages and an in-built code editor, Google rebranded API.AI as Dialogflow and relaunched an already impressive tool that allows users to make custom chatbot.
What is Dialogflow?
Dialogflow is an interactive SAAS tool that allows you to create your own chatbot and deploy it on your websites as well as different social media channels such as Facebook, Twitter, KIK, Telegram, Skype, and others.
What’s great about Dialogflow chatbots is that you don’t have to program any NLP logic manually. Dialogflow handles all the NLP so that your web application can handle all the business logic from its back-end.
Dialogflow chatbots are also language agnostic and you can export all the chat data of your chatbot can be exported from or imported to Dialogflow in JSON data format. This means it lets you develop your application in any server-side language as you want).
The web development team at The Brihaspati Infotech recently got the opportunity for creating dialogflow chatbot and integrate it in an Odoo powered web application. With this article, we aim to share detailed insights for:
- How to make chatbot with Dialogflow
- Our own experience in Dialogflow chatbot integration with OdooERP
- The challenge we faced while Dialogflow chatbot integration with OdooERP and our approach
Let’s begin.
How To Make Chatbot With Dialogflow
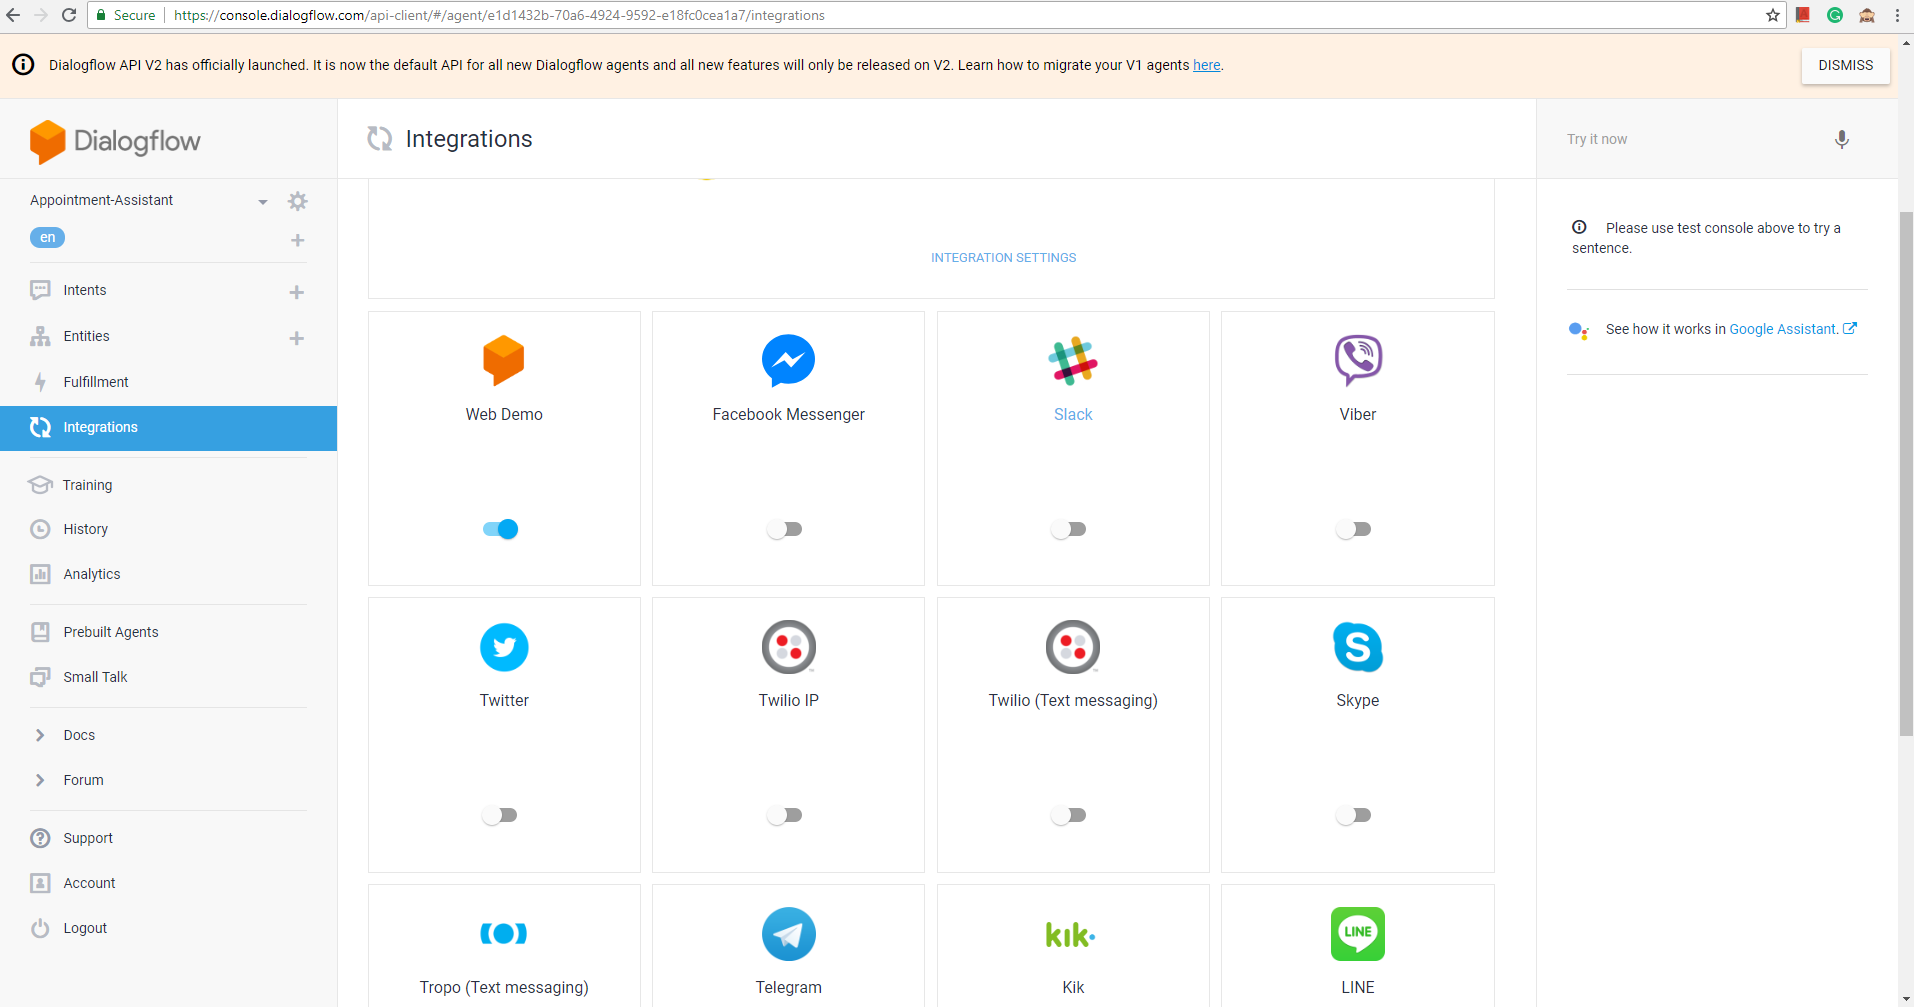
As soon as you start creating Dialogflow chatbot, it presents you with various inbuilt integrations that you can enable. You can either select chatbot integration with your web application using “Web Demo” or you can opt for chatbot integration with social media channels such as Facebook, Slack, Viber, Skype and others from right within the Dialogflow interface.
Our Use Case:
As we were looking to integrate dialogflow chatbot in a website built with Odoo website builder, we utilized the “Web Demo” chatbot option that allows us to embed dialogflow chatbot into our website.
Creating an agent
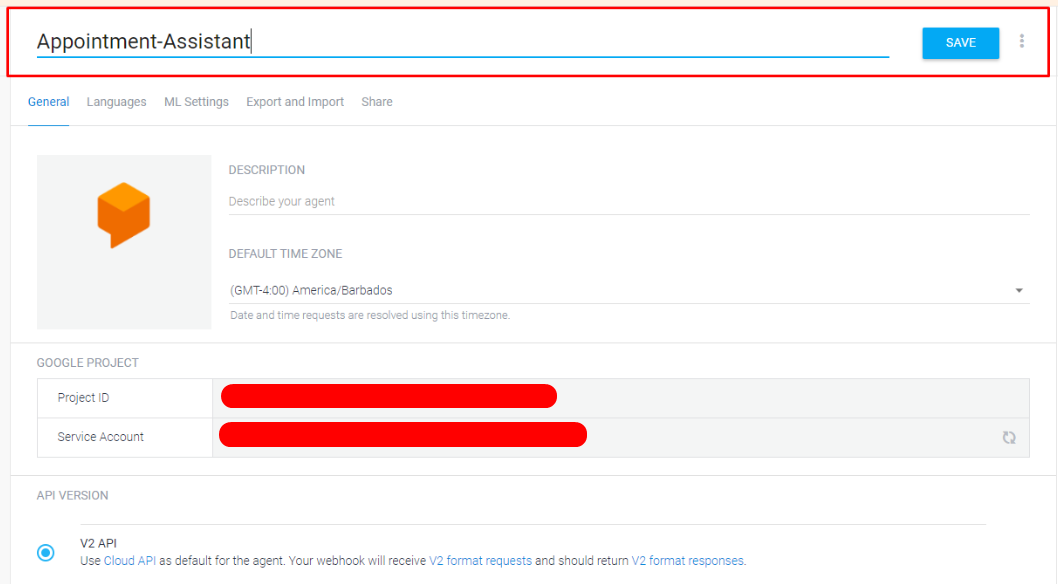
Agents are just another way to refer to your Chatbot module. With Dialogflow, you can create multiple chatbots for different use cases using a single account. Hence defining your agents upfront is the right way to start things off.
Our Use Case:
Our dialogflow chatbot was built to accept medical appointments from patients on behalf of a doctor. The patients should be able to select:
- The type of appointment: Online or In-person
- Should be able to enter details about the health issue
- Should be able to provide data and time for the appointment.
We named our bot “Appointment Assistant”.
Defining Conversation Intents
A chatbot needs the ability to process natural language in order to answer back to a user. This involves understanding the intent of a user who is engaged with the chatbot. A user’s intent can be a simple Hi or an underlying goal that the customer is looking to accomplish, for eg: Booking an appointment.
Different users may engage with the chatbot in different ways to accomplish the same goal. For a conversation starter like “Hi” users may use “Greetings” or “Hello”.
In order to make sure that your chatbot understands the user intent and replies back purposefully, Dialogflow allows you to group potential phrases under an intent. Based on these phrases you can assign the response texts that the bot will use.
Each Intent allows you to set up:
-
The context and events of the Intent:
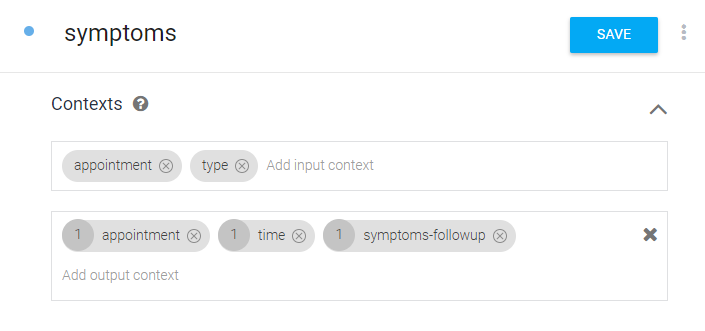
Used to remember the Intent parameter values so the bot can distinguish between different intents. Using Contexts for Intents, your bot will be able to identify in case the user switches their context in the middle of an ongoing conversation
Our Use Case
As our bot will be helping our user to schedule an appointment, the Intent of the user can switch between a “Greetings” to “Requesting for an appointment”, “Sharing their medical symptoms”, “Providing their appointment preferences” and so on.
For instance: if a user asks the bot to create an appointment, they might say something like: “I need an appointment” and follow it up with “I am having a skin rash”. The bot will be able to identify that the user’s intent has switched from booking an appointment to booking an appointment for a skin rash allergy.
This way, the bot passes values of one Intent using its context to another intent.
-
Training phrases:
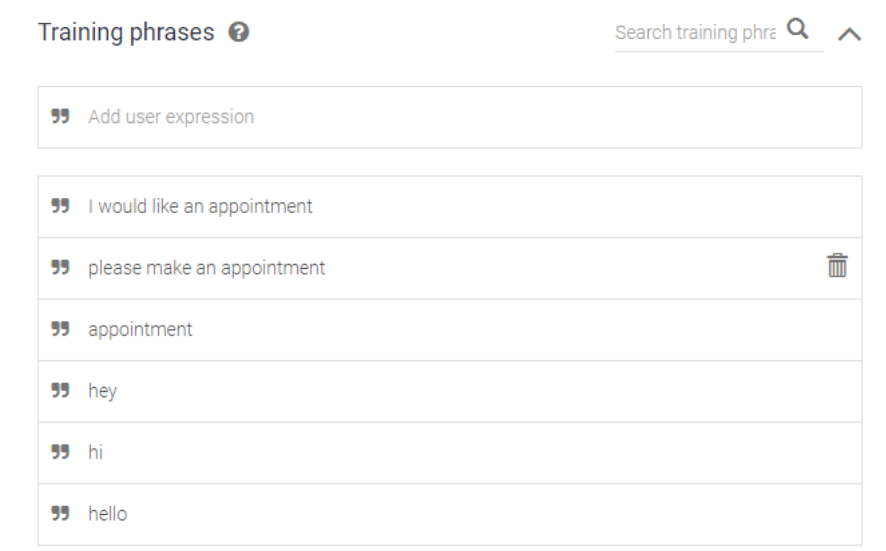
When a user makes an input to the chatbot, your bot matches the customer input with the phrases you have defined under each intent. Based on these phrases the bot provides a response to the user. The more these training phases are defined, the better your bot will perform.
Our Use Case
We created different phrases under each intent. This included phrases for Greetings, Confirming the user’s intent to book an appointment, Confirming user’s symptoms, Appointment date and time and so on.
For instance, the training phases for confirming the user’s intent to book an appointment looked like:
-
- “Book an appointment for me”
- “Make an appointment”
- “I need an appointment”, and so on.
-
Bot Responses:
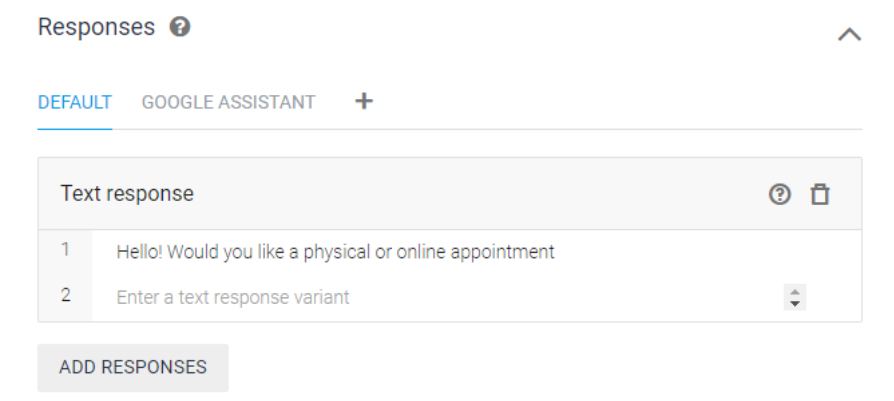
This is where we need to add the bot responses. Each Intent can have it’s own responses and each response can have different variations to make the bot sound more human. Whenever the context of a user’s message matches the phrases defined in an intent, the chatbot will utilize the response messages within that Intent to reply back to the user.
Our Use Case
We defined unique responses for each Intent and in many cases, we also added variations to the responses wherever applicable.
-
Actions and parameters:
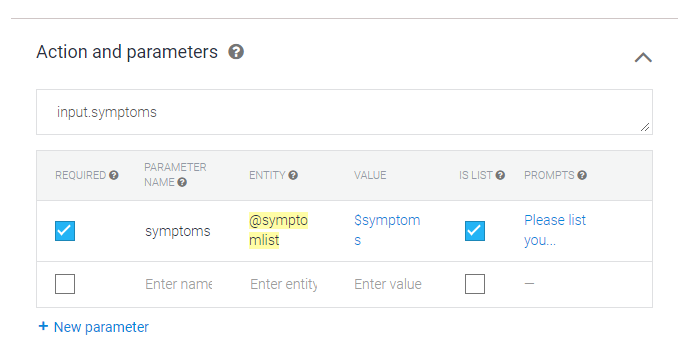
This is the most crucial part of the chatbot Intent setup process. The console allows you to define a prompt that will be asked when the bot realizes the intent of the customer. The answer to this prompt can be marked as “Required” as well. The input provided by the customer for this prompt is saved in a parameter which is passed into the entity list so it can be matched with the available list of potential answers.
Based on different entity values collected through different intents, the final list of entity data is sent for fulfillment through a parameter.
Our Use Case:
Actions and parameters are based on Intents. Hence, we created different actions depending upon different intents. One such use case was to collect the symptoms of a user for which he is looking to book an appointment.
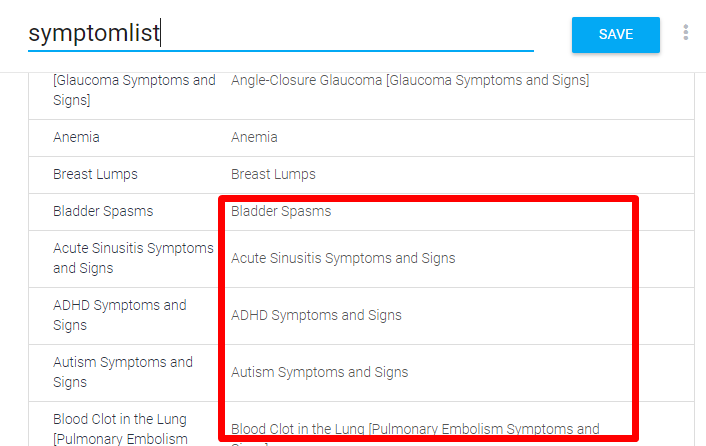
To collect symptoms values, we provided a prompt that asked the user to list the symptoms. The user response was passed as a parameter “Symptoms” into the entity list “@symptomlist”.
The user’s response was matched with the symptoms in our list and once the data was validated, it was saved in the variable “$symptoms” so it could be passed for fulfillment.
Similarly, we created various other actions for different intents such as Name of the user, Appointment date and time, Type of appointment – online or offline and so on.
Entities
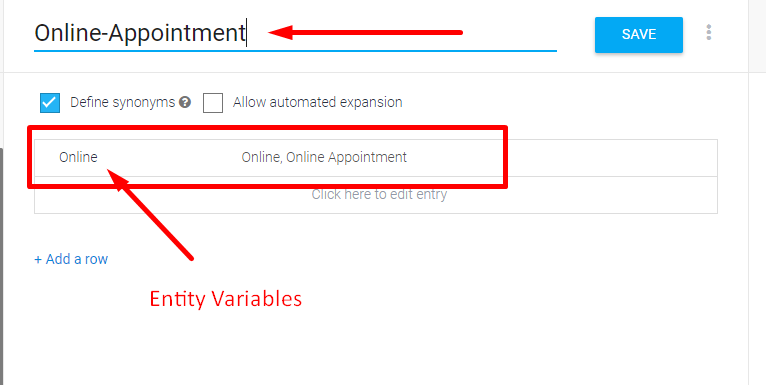
As you must have already understood from our use case for Actions and Parameters that entities are potential answers by the users that are used to match and validate the data entered by the user in an intent. This potential answer depends upon the business niche and the underlying goal of the user.
Our Use Case
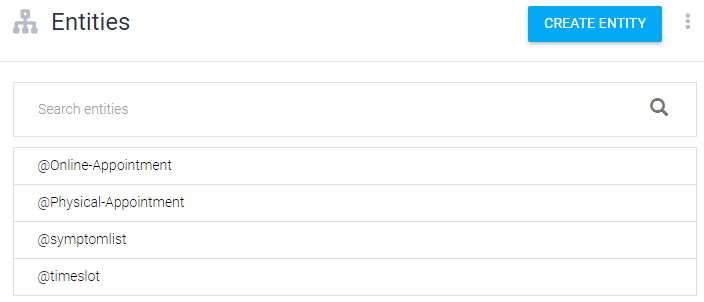
Entity solely relies upon the data that the chatbot needs to collect from the user. In our case, there were multiple data values that were to be collected for setting up an appointment. For instance, Appointment Type, Symptoms list, and Appointment timeslot.
Within each Entity was a list of entity values which were used to validate the user input.
Dialogflow allows you to define entities in three ways:
- 1. Using the default method to define an entity and set up the input values that the entity needs to store data into.
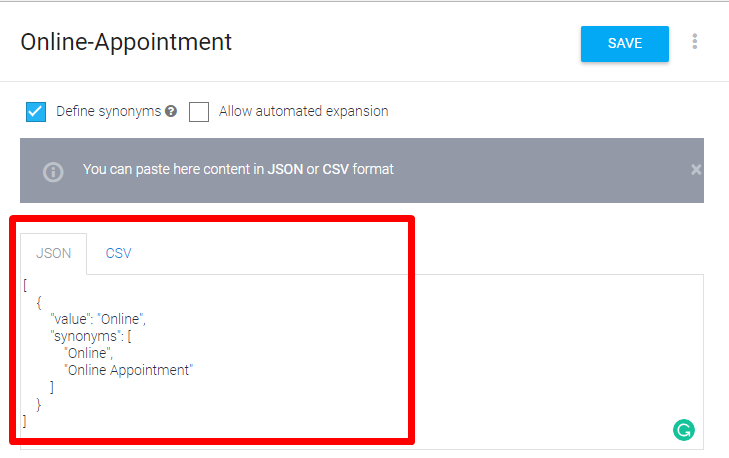
- 2. Setup entities dynamically using JSON or CSV file.
- 3. Using synonyms of predefined entities.
Fulfillment
Till this point, our chatbot has identified what the user is aiming to do (in our case: book an appointment) and has also collected the data that your system will need to provide a response to the customer.
The next step is to actually utilize the user inputs and send it to the application that will be processing this data and sending a response back to the user through the bot.
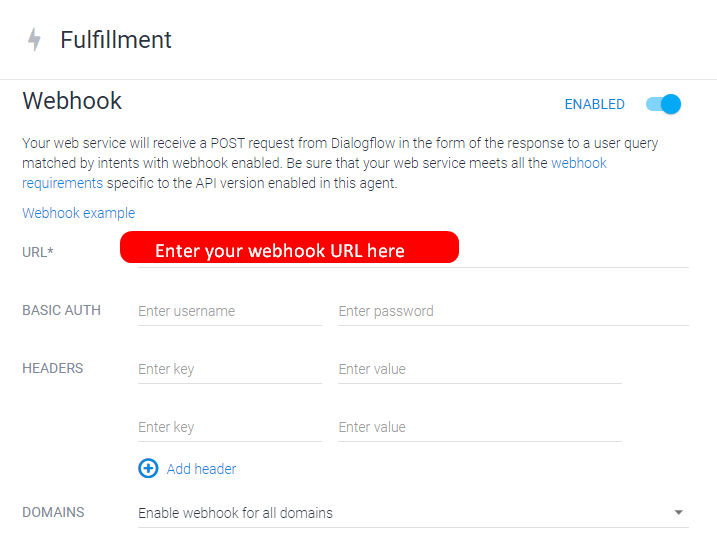
This is where Fulfillment comes into play. To enable the transfer of data, Dialogflow allows you to set up your own webhook which can receive and fetch data in JSON format.
By mentioning our webhook URL in the “Fulfillment” tab, we can send all the data collected from a user to our own web application so it can be processed and a response can be generated.
Once the information is processed by your application, the response can be fetched back to the chatbot and can be presented to the user.
This process can also be visually represented as following:
Our Use Case
The data collected by our chatbot was integrated with OdooERP. The appointment data was sent to the Odoo database where we programmatically checked whether the booking time entered by the customer is available or not.
In case it is not available then we utilize the fallback response which asks the customer to request another booking time.
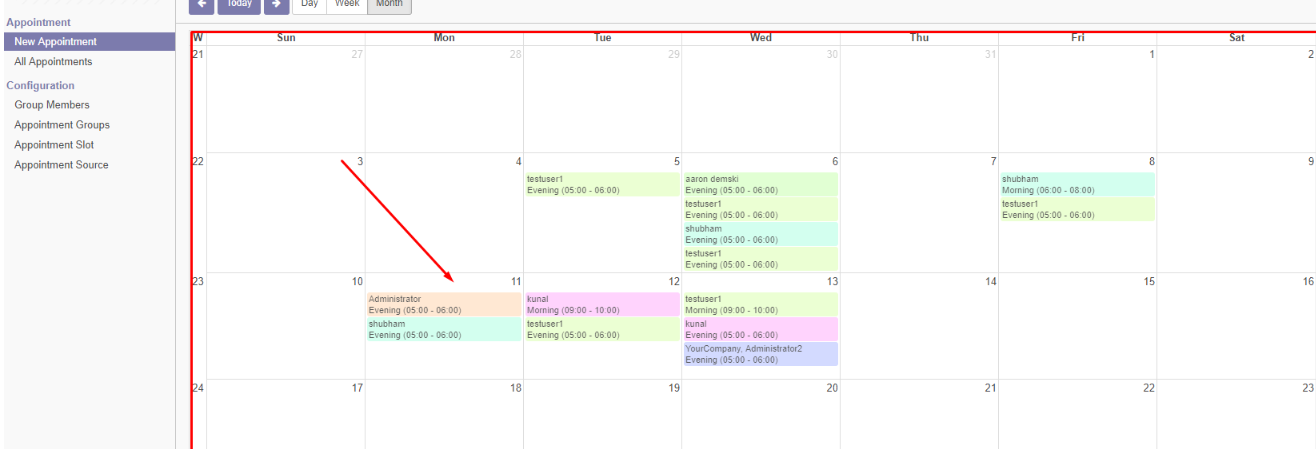
In case the appointment slot is available then we send a success message to the client and create a new appointment for the website admin within the default Odoo calendar.
The Challenge Integrating With Odoo
The process of integrating the chat parameters within any 3rd party systems is very straightforward. Considering that Dialogflow provides all the data as a real-time JSON feed and POSTS it to a webhook that we created to collect all the data and save it in Odoo’s Postgresql database, the issue came up when we tried to fetch the confirmation message from Odoo.
It was identified that instead of generating a standard JSON data feed, Odoo provides data in JSONRPC format. JSONRPC consists of some additional parameters as compared to the standard data feed.
Due to this, we were not able to fetch a confirmation from Odoo into Dialogflow in a straightforward manner.
The Solution
To workaround to this defiance by Odoo was implemented by setting up another intermediate server where we posted the data generated by Odoo. Utilizing PHP, we refactor the Odoo’s JSON feed in real-time and create a new data feed that matches the structure accepted by Dialogflow.
This way, every time a response is generated by Odoo, it is first pushed to our intermediate server where it is processed into a format which is accepted by Dialogflow. Once processed, the response is POSTed back to Dialogflow to be shown to the user through the chatbot.
Conclusion
While our use case included saving the chat data in Odoo which created some minor hiccups due to structural differences of their outputs, Dialogflow still remains our one of the top choice when we need to build AI chatbot.
While most other CMS, CRM and ERP solutions may support the same structure as that of Dialogflow, there can certainly be instances when you may encounter a similar issue. If there is an instance where such situation arises, we hope that this blog will help you in planning an approach how to make chatbot with dialogflow.
We are sure you must be encouraged at this point after realizing how easy it is to build your own AI chatbot with Dialogflow. If you have any questions or you are planning to hire web developer for implementing a chatbot for your web application, then don’t hesitate to contact us now. The Brihaspati Infotech has been a consistently providing AI-based solutions to clients all around the globe with supreme efficiency, support, and reliability.
